Creating Identity Providers
Since customer single sign-on can be utilized in multiple ways on a variety of different web domains, all types of customers with different identity providers may be trying to access those resources. When configuring your system for customer single sign-on, you have the option of configuring the system for multiple identity providers to accommodate for this.
For example, a single portal can provide entry into a chat through different areas of the portal. These can be owned by different vendors, such as a virtual assistance provided by a different vendor. Thus, the application must allow customers to login to chat SSO through multiple identity providers.
On the Providers page, you can view the following details:
-
Name: Name of the provider.
-
Description: The description for the provider.
-
Actions: You can click the Set as Default option to set the provider as default.
To create identity providers:
-
From the Partition and Departments dropdown menu, go to the partition space.
-
From the Navigation menu, browse to Security > Single Sign-On > Providers.
-
On the List page, click the New
 button.
You can create a maximum of 25 identity providers in a partition.
-
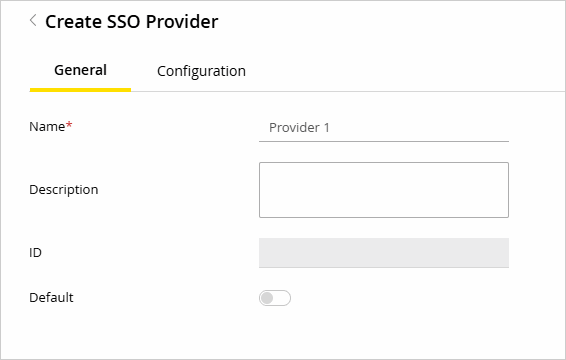
In the Properties pane, under the General tab, provide the following:
-
Name: The name of the identity provider
-
Description: A description of the identity provider
-
ID: This field is automatically updated and cannot be changed.
-
Default: Click the Toggle
 button to make this the default identity provider for customer single sign-on configurations.
-
-
On the SSO Configuration tab, provide the following details for your OIDC Provider:
-
Authorization Grant Type: This field is preconfigured to
authorization_codeand cannot be changed. -
Authorization URI: Enter the URI of the
/authorizeendpoint provided by your Identity Provider (IdP). -
Client Authentication Method: Choose one fo the following client authentication method supported by your IdP:
-
Use client_secret_basic when your environment supports setting HTTP Authorization headers. This method is generally preferred for its better security, as it transmits credentials in the Authorization header.
-
Use client_secret_post if header customization is restricted or unsupported in your environment. This method sends the credentials in the body of the POST request instead.
-
-
Client ID: Specify the Client ID assigned to your OIDC application in your IdP.
-
Client Secret: Enter the Client Secret associated with your OIDC application. If this secret has an expiration date, ensure it is updated in eGain before expiry to prevent service disruption.
-
Scope: Enter the scopes configured in your IdP. Required scopes include
openid,email, andprofilethat are added by default. Modify this field as required by your External IdP configuration, separated by commas. -
Token URI: Provide the URI of the
/tokenendpoint used to obtain access tokens from your IdP. -
User Info URI: Provide the URI of the
/userinfoendpoint used to retrieve user profile information. This field is optional; provide this value only when required by your IdP. -
User Name Attribute Name: Enter the name of the attribute in the ID token that uniquely identifies the user (e.g.,
sub,email, orpreferred_username). -
JWK Set URI: Provide the URI of the JSON Web Key (JWK) Set used to validate token signatures.
-
Logout URI: Enter the URI of the logout endpoint used to terminate the user session with the IdP. This field is optional.
-
After saving the configuration, the Redirect URL and Post logout URL are generated and displayed. These URLs are used to finalize the OIDC client application configuration in the customer’s Identity Provider (IdP) by adding them as the Sign-in Redirect URI and Logout URI to enable successful federated login.
-
-
Click the Save button.