Creating Registered Application
When developing integrations with external applications, it is essential to register these applications with eGain. This process allows external applications to receive and subscribe to events from eGain, enabling seamless integration and interaction. By registering applications, users can ensure that their systems can effectively communicate and interact with eGain, providing a robust framework for building customized solutions.
The feature supports creating two new types of client applications for interacting with the eGain application:
The synchronous and asynchronous applications are not used to log into the eGain system.
- Synchronous Application: This type of application is used to subscribe to synchronous events from the eGain system in real-time, which are pushed to the Callback URL that is configured for the external application. This means the client app handles events immediately as they occur. You need to create custom rules in a workflow to subscribe to synchronous events. For more information, see Creating Custom Rules.
- Asynchronous Application: This type of application is used to subscribe to asynchronous events which are pushed to the Callback URL by the webhook services. The handling of these events can occur at a later time, allowing for more flexible processing since the client app does not need to handle the events immediately when they occur.
To create registered applications:
-
From the Navigation Menu, browse to Integration > External Apps > Registered Applications.
- In the Register Application page, click the New
 button.
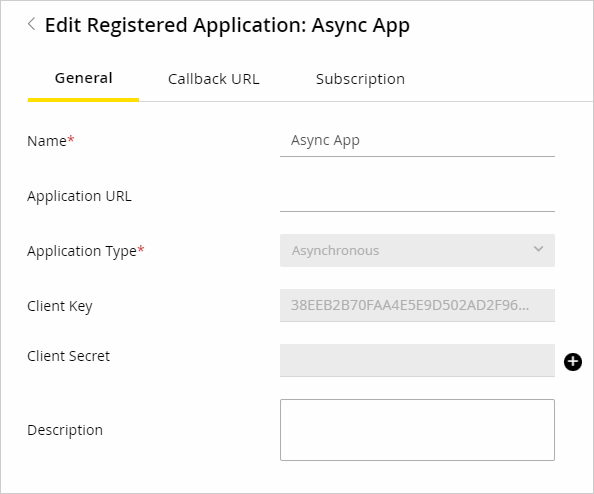
 - In the Create Register Application page, on the General tab, provide the following details:
-
Name: Provide a name for the client application.
-
Application URL: This setting is not in use and is only enabled for ESC.
-
Application Type: Select one of the following options: Synchronous or Asynchronous.
-
Client Key: The client key is generated automatically upon successful creation.
-
Client Secret: This field is not applicable for synchronous and asynchronous applications.
-
Description: Provide a suitable description to give additional context for the application.

-
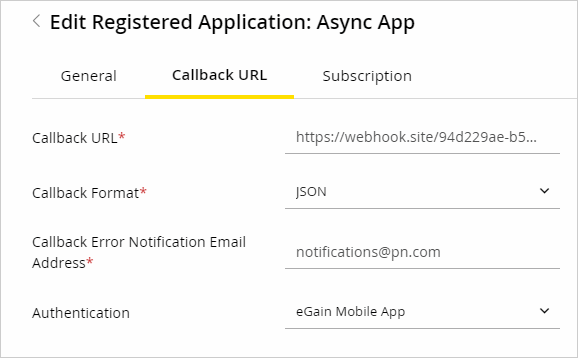
- On the Callback URL tab, provide the following details:
-
Callback URL: Provide the Callback URL to which the webhook services send the events to.
-
Callback Format: Select the JSON format.
-
Callback Error Notification Email Address: The error notification is sent to the email address configured in this setting. The content of the error notification includes the name and description of the registered client, the callback URL, the error response received when calling the callback, the number of retries left, the next retry attempt time, and an indication if all retries have been exhausted.
-
Authentication: From the dropdown, select the authentication that you have created for the application.

-
-
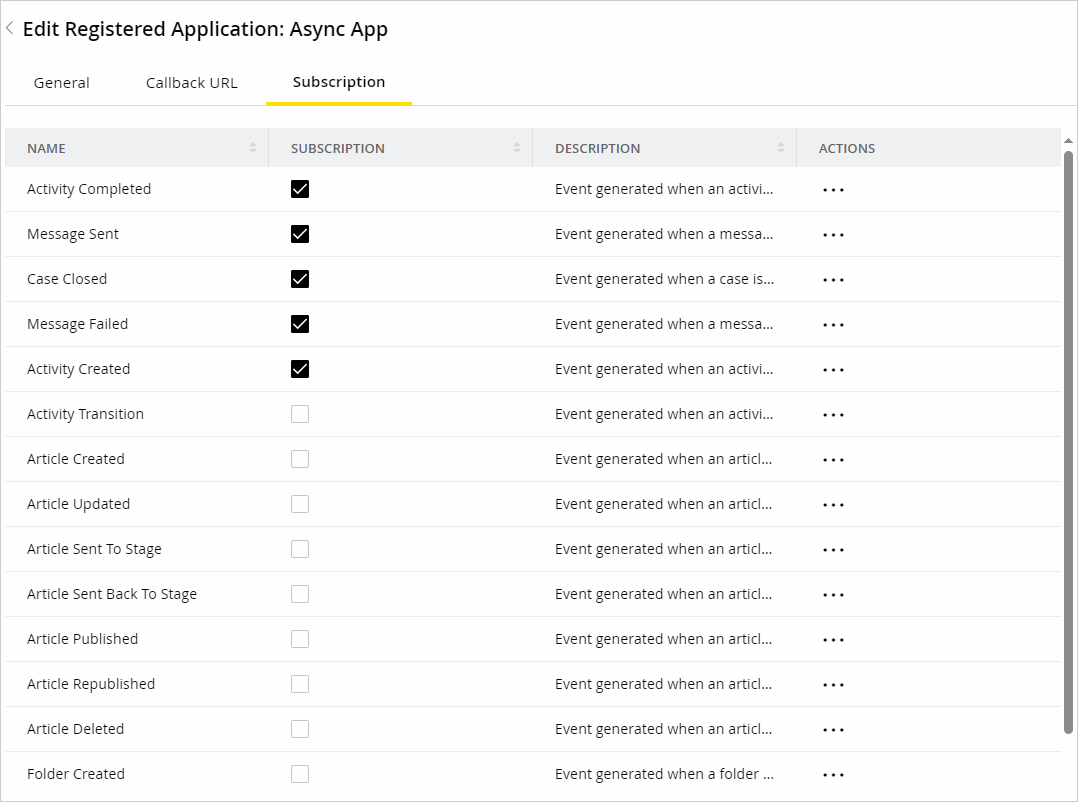
On the Subscriptions tab, select the events you want to subscribe to by checking the box next to each event. You can also manage the channels and view attributes related to the event by clicking the Edit button in the Actions column. The Subscriptions tab is only available for asynchronous applications. For synchronous applications, you need to create custom rules through the custom rules node in a workflow to subscribe to events.

-
Click Save.