Master Page
Creating Supervision Monitors
To create a monitor:
- In the Desktop toolbar click the User Options menu.
- From the dropdown, select the My Monitors option.
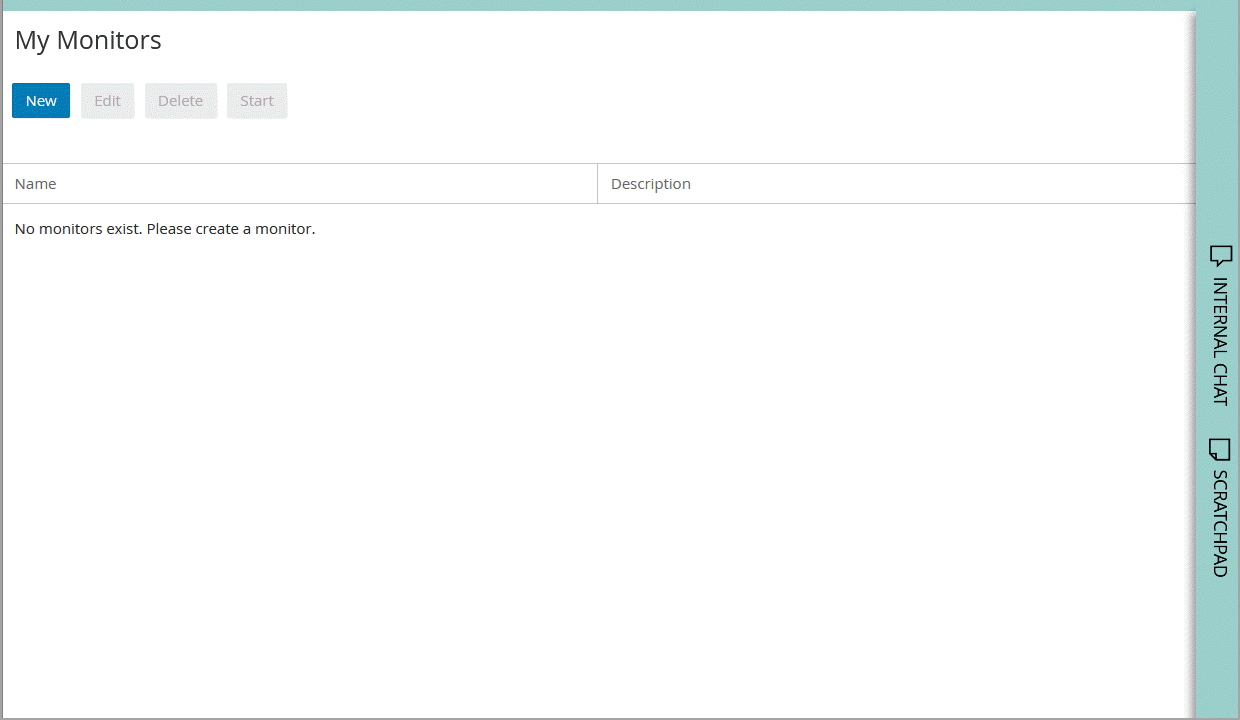
- When the window refreshes, click the New button. The Create Monitor window opens up.
- On the Create Monitor window, provide the following details.
- Name: Type a name for the monitor. This is required information.
- Description: Provide a brief description.
- Start type: From the drop down list, select a start type for the monitor from the following options:
- Automatic: The monitor runs automatically and if notification conditions are met, it sends alerts automatically at a fixed time interval, irrespective of whether the user who created the monitor is logged in or not.
- Manual: The monitor has to be started manually by the user who created the monitor.
- On login: The monitor starts automatically, once the user who created the monitor logs in. And if the notification conditions configured for the monitor are met, the alerts are sent automatically.
- Object Selection section: Select objects to be monitored. Select from users, user groups, and queues. Click the checkbox to make the selection. Once you are done selecting, click the Next button.
User Groups are visible only if the supervisor have the permission to view user groups. For more information, see eGain's Administrator’s Guide to Administration Console.
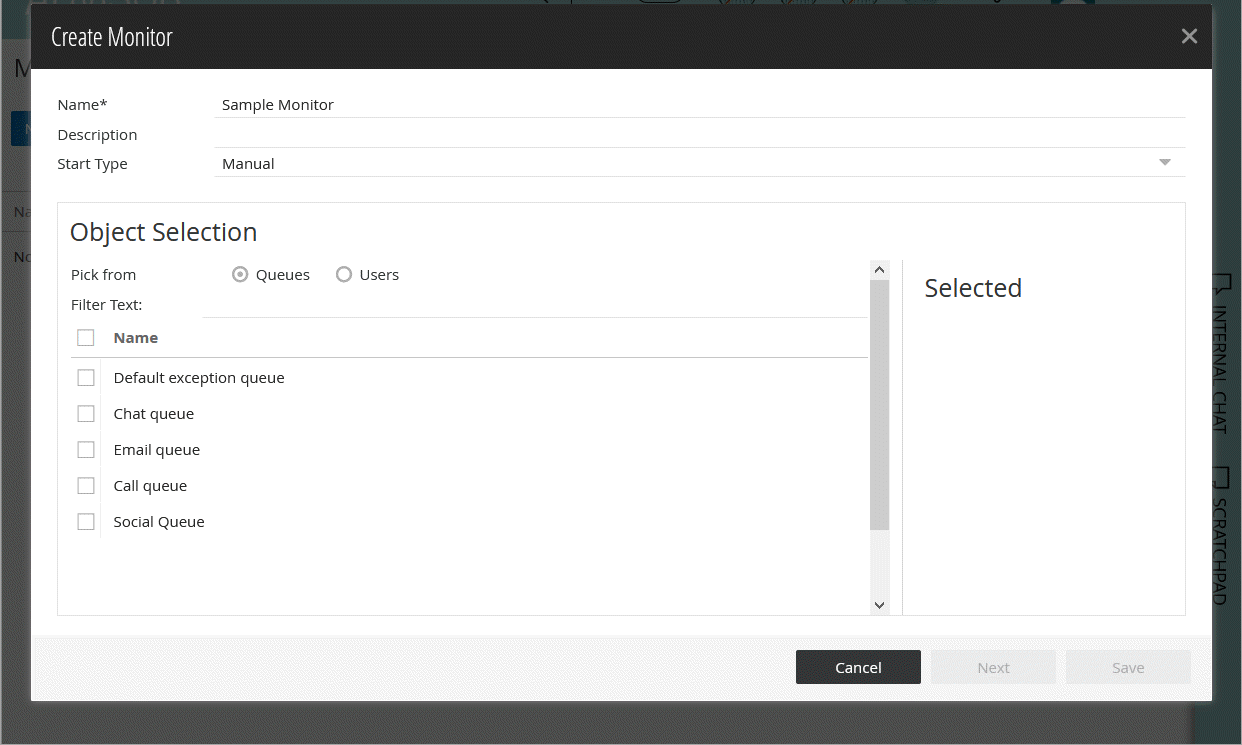
The Next button is enabled only after you provide the name for the monitor and select the objects to be monitored.
- On the next page, in the Select Attributes section, select the attributes of the Users, User Groups and Queues
to be monitored. For more details, see Queue Attributes, User Group Attributes, or User Attributes. Click the Next button.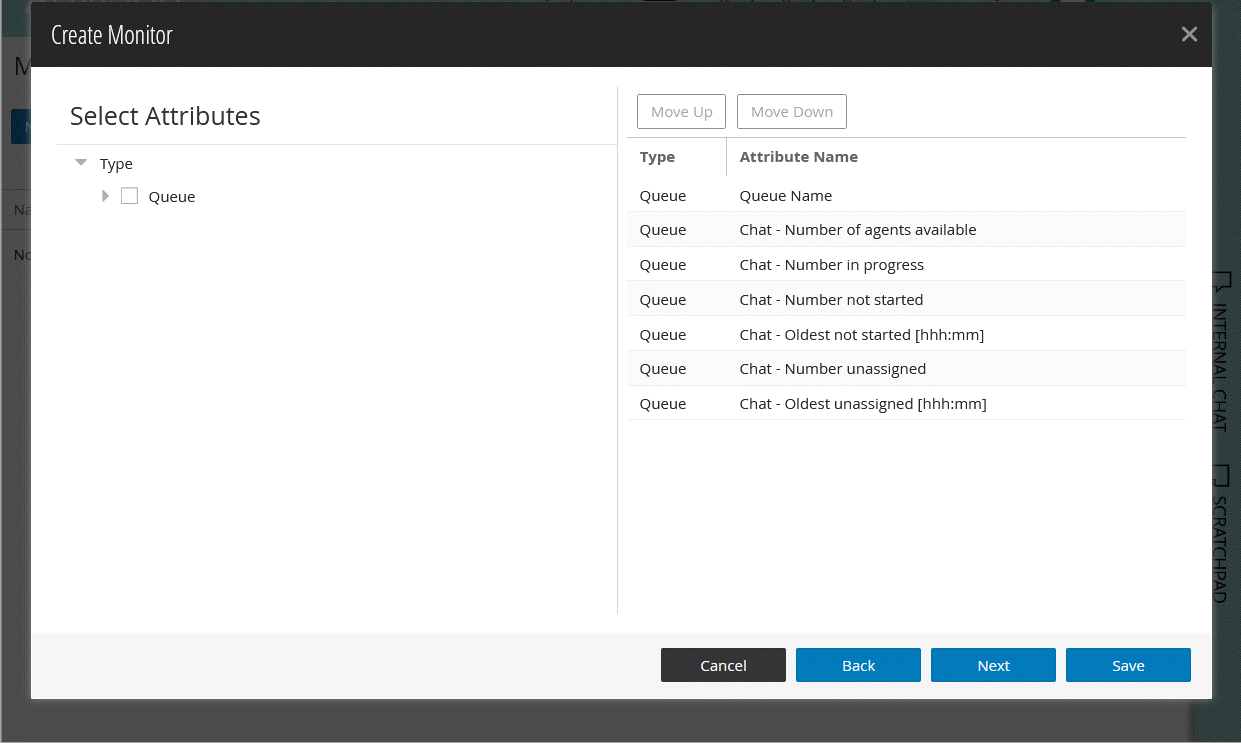
Some attributes are selected by default. They can be removed from the list if required.
- On the next page, perform the following:
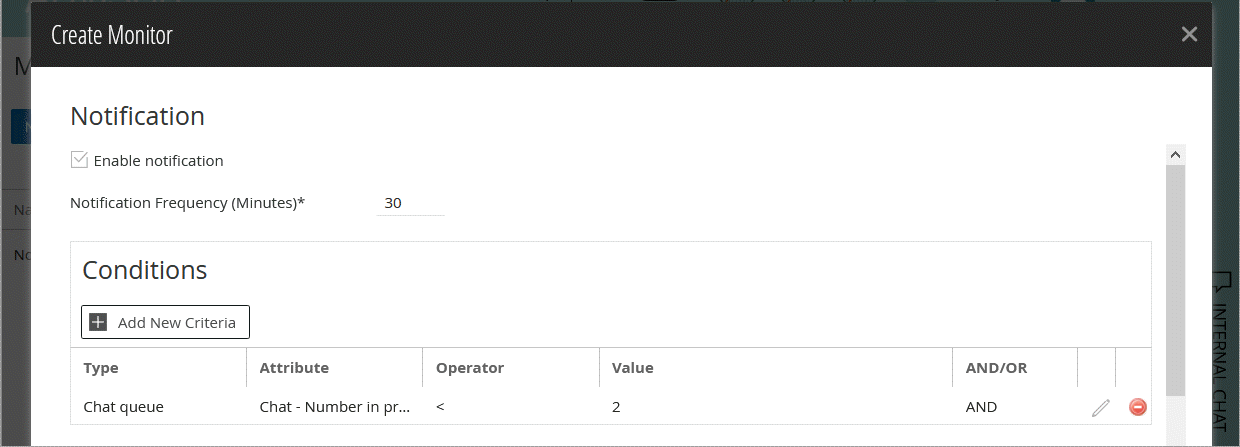
- In the Notification section, set the following:
- Enable Notification: Click the checkbox to enable notifications
- Notification Frequency (Minutes): Specify the time interval at which notifications should be sent when a condition specified in the monitor is met. The default value is set to 30 minutes.

- In the Conditions section, set the conditions for sending notifications.
- Click the Add New Criteria button.
- In the Add New Criteria window, specify conditions for raising alerts and sending notifications. Only objects and attributes that you have selected are displayed in the Type and Attribute field. Once you specify the condition, the Notification Type section is enabled.
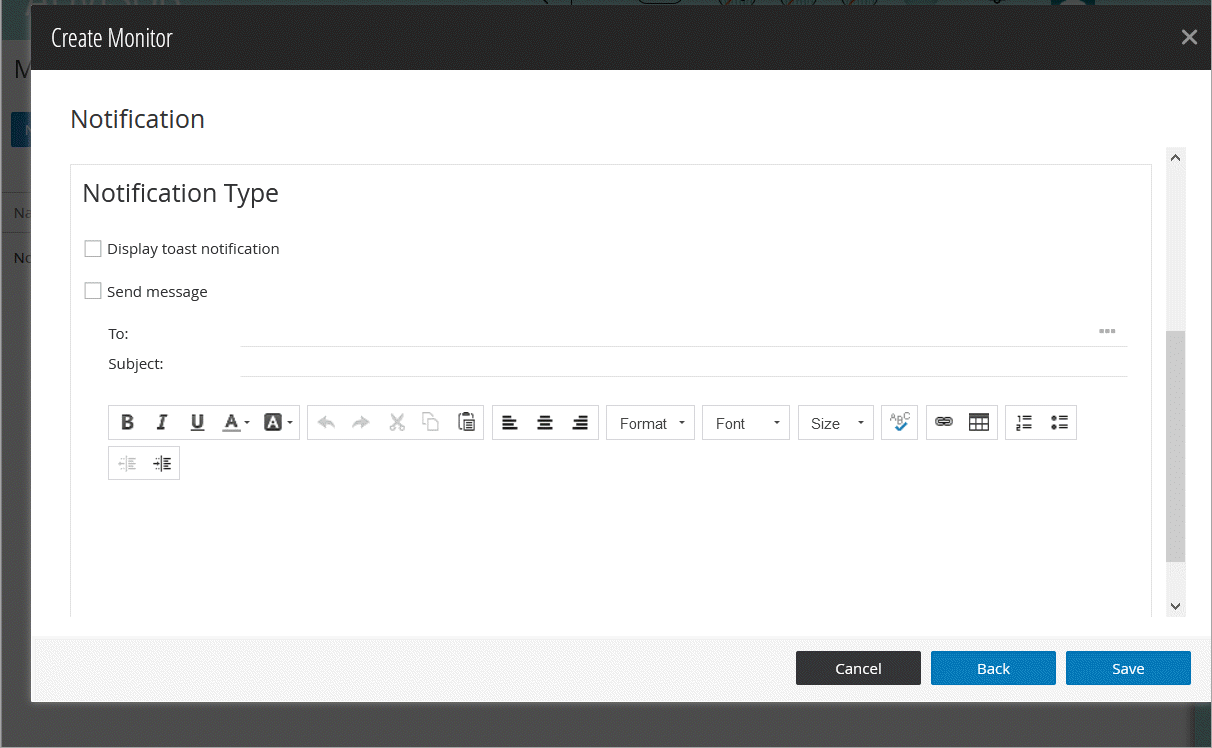
- In the Notification Type section, perform the following:
- Select the Display toast notification checkbox to configure the alert to be presented as a pop-up box on the monitor when an alert condition is met.
- Set up internal messages or emails to be sent when an alert condition is met. Specify to whom you want to send the notifications, subject of the message and content of the message. You can send notifications to internal users and to external email addresses.
It is always a good practice to enable notification for monitors. However, you can create and save a monitor without setting it up.
- In the Notification section, set the following:
- Click the Save button.
Related Topics