Integrating the AI Agent with Genesys
You can seamlessly connect your AI Agent with Genesys Cloud CX to provide real-time AI assistance directly within the agent desktop. This integration helps enhance agent productivity, streamline support workflows, and deliver a better customer experience.
The integration process involves setting up the Genesys app, authorizing it with your AI Agent, and then creating a widget in Genesys to embed the AI Agent experience.
The Genesys integration is available on the Settings > Channels (Legacy) tab, which replaces the Integrate Channel section. The Settings page is available only after you save a newly created AI Agent.
To connect AI Agent with Genesys:
- From the My AI Agents page, select the AI Agent you want to edit, select Settings, and then select the Channels (Legacy) tab.
- Under Apps & Integrations options, locate Genesys and click Connect to start the setup.
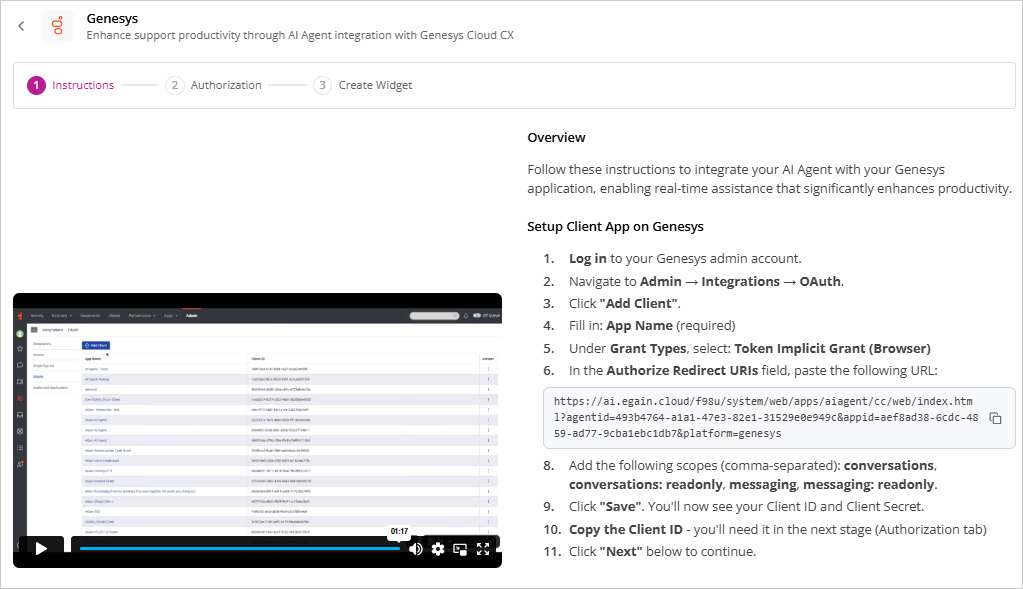
- Read and follow the instructions displayed in the Instructions page to set up your client application on Genesys. Remember to copy the Client ID as it is used to authorize the integration with the AI Agent.
- In the Authorization step, provide the Client ID and select the Genesys Cloud Region from the dropdown.
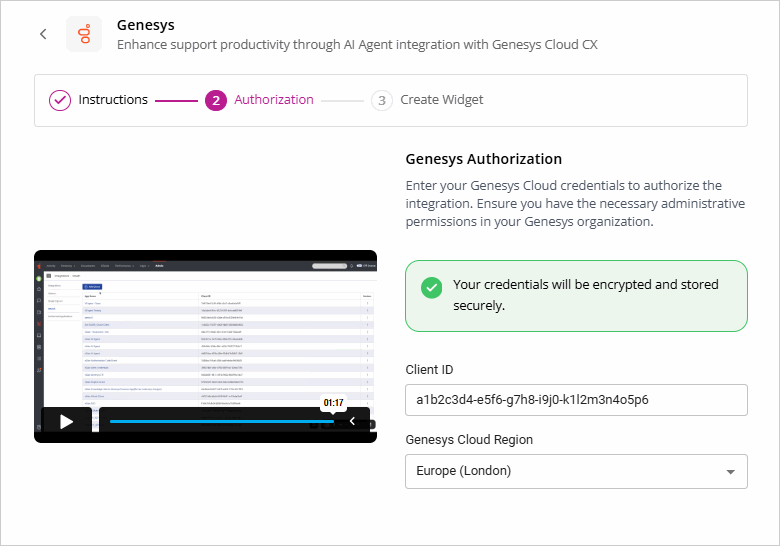
- Once the integration is authorized, proceed to the next step.
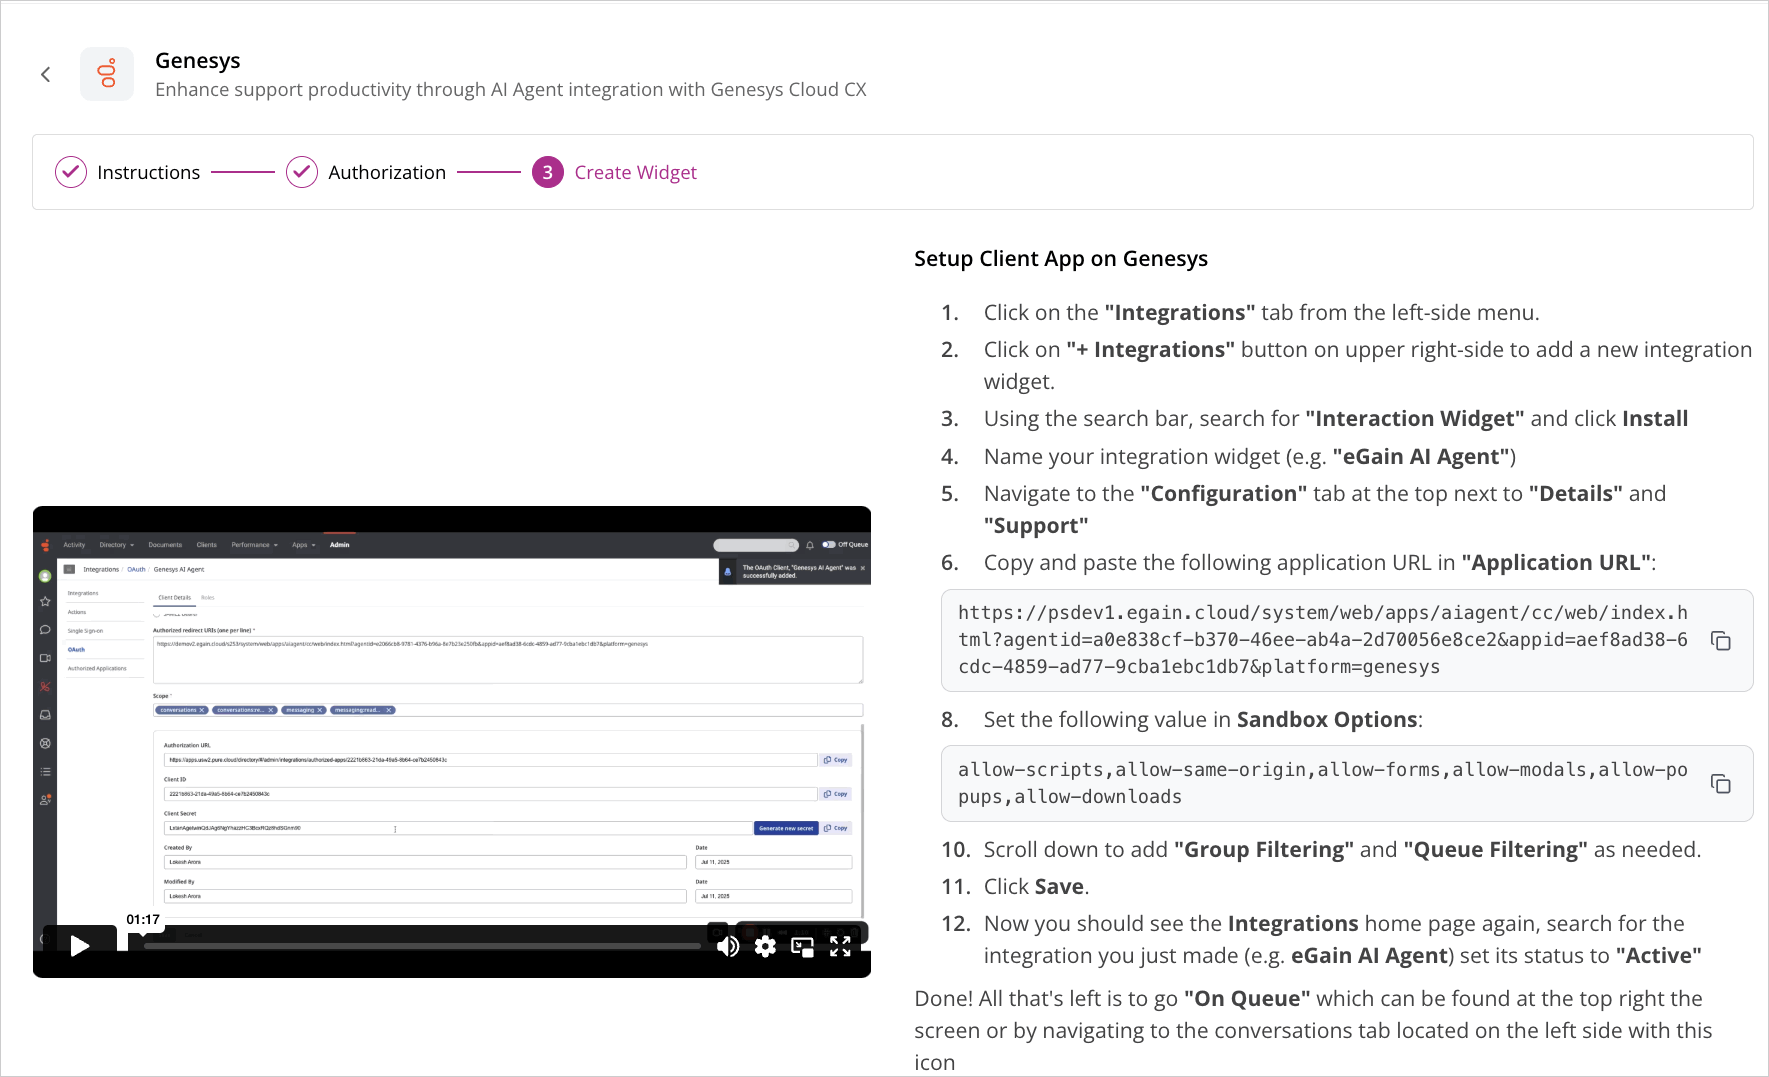
- Read and follow the instructions displayed in the Create Widget step to create a widget to embed the AI Agent.
-
Click the Save and Connect button.