Converting an Article to a Case Base
You can use the Convert Article to CBR AssistGPT prompt to automatically generate a decision flow diagram from the content of a knowledge article, and then convert that diagram into a case base. The flow diagram is rendered as a Mermaid flowchart, which you can review and edit before creating the case base. You can save the generated flow into a brand-new case base, or add it into an existing case base under a cluster that you choose.
Before You Begin
Ensure that the article you want to convert is open in the Edit Article page in the AI Knowledge Hub. If you plan to add the generated flow to an existing case base, ensure you have edit permission for that case base.
Converting an Article to a Case Base
To convert an article to case base:
- Open the article you want to convert and select the AssistGPT button in the toolbar. The AssistGPT prompt list appears.
- Select Convert Article to CBR from the list.
- The Article to CBR page opens, displaying a Mermaid flow diagram generated from the article content.
- The diagram uses the following node types:
- Diamond nodes — represent decision points or questions.
- Rounded and rectangle nodes — represent the start of the flow, article content, or end states.
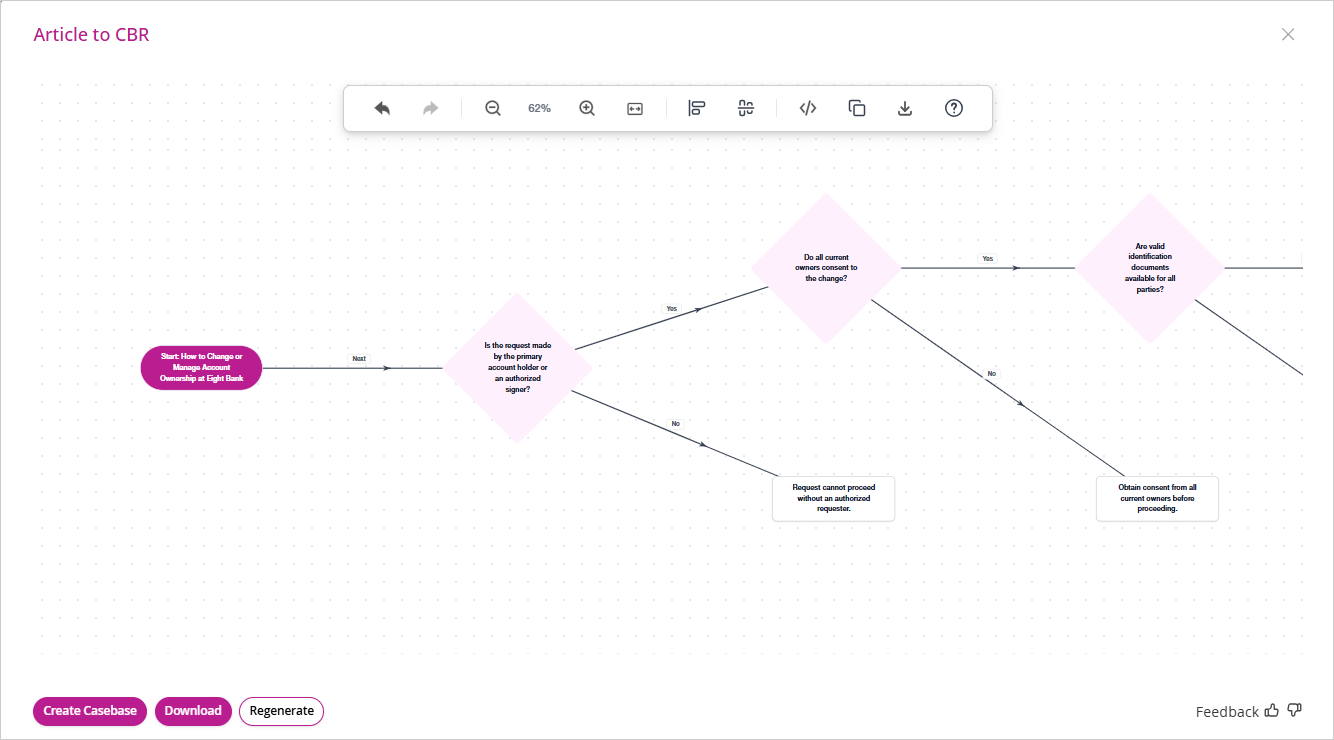
- Review the generated flow diagram.
- Use the toolbar at the top of the diagram to undo or redo changes, zoom in or out, fit the view to the screen, align nodes, view the source code, copy, or download the diagram.
- If the diagram does not accurately represent the article content, select Regenerate to generate a new diagram.
- If you want to save the diagram without creating a case base, select Download.
- Optionally, use the feedback icons in the bottom-right corner to rate the generated output.
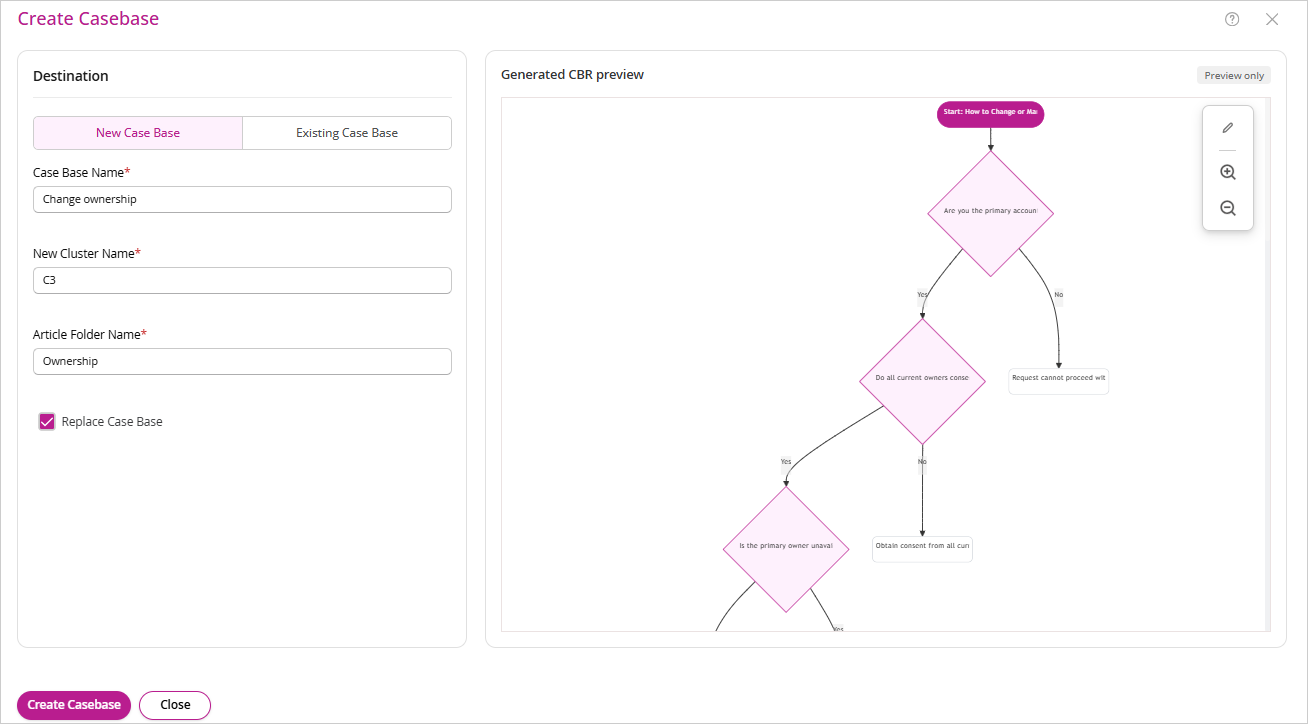
- If the generated diagram is valid and accurate, select Create Casebase. The Create Casebase dialog opens, with the generated flow diagram displayed on the right as a Preview only reference. Under Destination, choose one of the following:
- New Case Base — creates a brand-new case base for the generated flow.
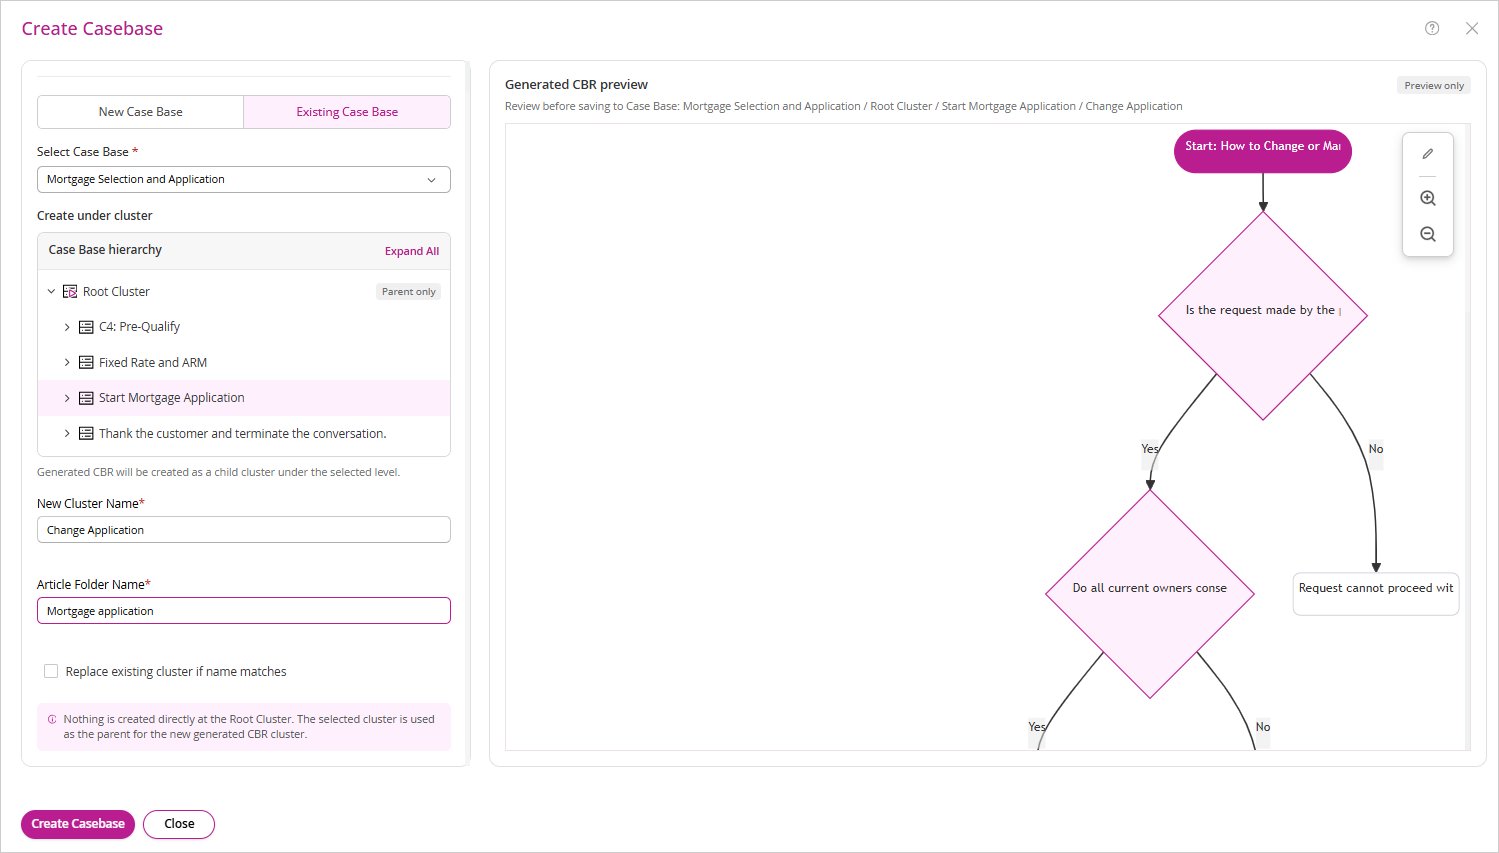
- Existing Case Base — adds the generated flow into a case base that already exists.
- If you selected New Case Base, enter the following:
- Case Base Name: The name for the new case base.
- New Cluster Name: The name of the cluster that will be created to hold the generated flow.
- Article Folder Name: The folder where the associated articles are stored.
Optionally, select the Replace Case Base check box if you want to overwrite an existing case base with the same name.
- If you selected Existing Case Base, enter the following:
- Select Case Base: Choose the case base you want to add the generated flow to.
- Create under cluster: The Case Base hierarchy tree appears, showing the Root Cluster and its child clusters. Select Expand All to view the full hierarchy, then select the cluster under which the new cluster should be created.
The generated CBR is always created as a new child cluster under the level you select here. Nothing is created directly at the Root Cluster, even if you select Root Cluster as the parent.
- New Cluster Name: The name for the new cluster that will hold the generated flow.
- Article Folder Name: The folder where the associated articles are stored.
Optionally, select the Replace existing cluster if name matches check box if you want to overwrite a cluster with the same name at that level.
The Generated CBR preview panel updates to show a breadcrumb of where the new cluster will be saved (Case Base / Root Cluster / selected cluster / new cluster name), along with the full flow diagram, so you can confirm the destination before saving.
- The Create Casebase button remains disabled until all required fields are completed. Once enabled, select Create Casebase to save the case base and cluster. The Article to CBR page reappears, and the Create Casebase button is replaced with View Casebase.Optionally, select View Casebase to open the newly created case base or cluster directly in the Case Bases section of the AI Knowledge Hub.
Validation
When you select Convert Article to CBR, the system validates the generated Mermaid output before displaying the diagram. If validation fails, the diagram is not rendered and the Create Casebase button is disabled.
Valid Output
If the generated diagram passes validation, the system displays the rendered flow diagram in the Article to CBR page. You can review and edit the diagram, and the Create Casebase button is enabled.
Invalid Output
If the generated diagram fails validation, the system displays an error message describing the specific issue. The Create Casebase button is disabled until the output is corrected. Common validation issues include:
-
Invalid Mermaid flowchart syntax
-
Missing or unlabeled transitions between nodes
-
Incorrect node types (for example, a decision node rendered as a rectangle instead of a diamond)
-
Disconnected or orphan nodes
-
Missing terminal nodes at the end of one or more branches
-
Duplicate node text
To resolve validation errors, select Regenerate to request a new diagram from AssistGPT.
Viewing the Case Base
When you select View Casebase, the Case Bases section opens, displaying the case base as a hierarchical tree. The new cluster you created appears nested under the parent cluster you selected (or under the Root Cluster, for a new case base), with the generated decision points and end states listed beneath it. You can expand nodes in the tree to review the full structure.