Setting Up Header User Controls
Certain user controls like the dark mode selector and the portal selector can be enabled and configured using the header user control settings. The changes that you make can be viewed simultaneously in the theme workspace.
To set up header user controls:
-
In the Navigation Menu, browse to Publishing >Themes.
-
On the Themes page, navigate to the Custom Themes section and click the Edit button next to the theme you want to customize.
-
In the Themes workspace, navigate to the Global > Header > User Control and click the Expand button.
-
From the expanded menu, make the following selections:
-
Show Dark Mode Icon: Click the Toggle button to display the Dark mode icon in the header.
-
Show Portal Name: Click the Toggle button to display the portal name in the header.
-
Show Portal Selector: Click the Toggle button to display the Portal Selector in the header. Once you enable this setting, the following configurations become available:
-
Show Portal Links in Menu: If you enable this setting, the portal selector option becomes available in the User menu dropdown. Disable it if you want to display the Portal selector in the header.
-
Navigate to App on Portals Link Click: Click the Toggle button to open the My Portals page in a new tab. When this setting is disabled, the portals can be viewed in a dropdown list.
-
Number of Portals to Display: You can either type in or click the increment
 and decrement
  buttons to set the maximum number of portals displayed in the portals list. The maximum value is 999 and the minimum value is 1.
 -
Show Department with Portals: Click the Toggle button to display the department names for each portal.
-
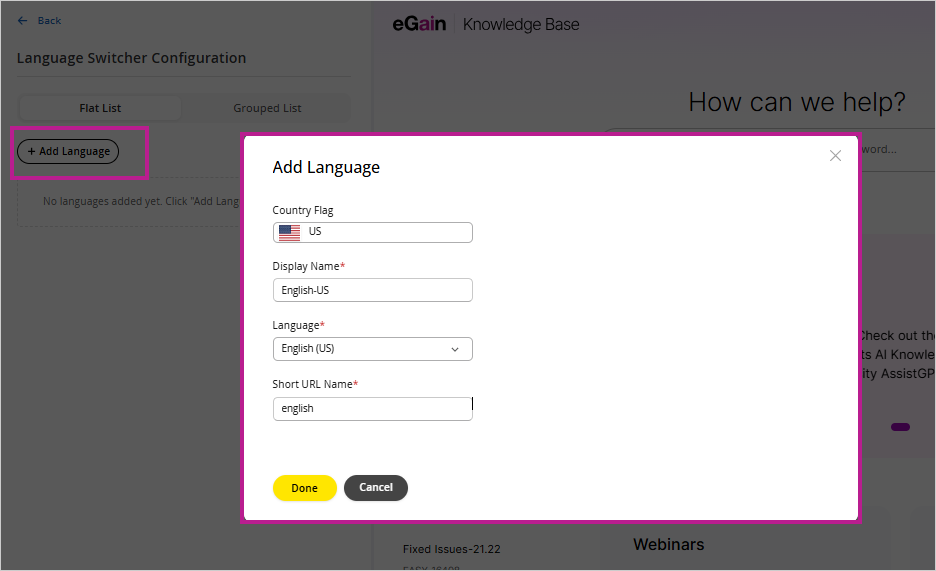
- Language Switcher: Click the Toggle button to display and edit the language switcher. You can either add a flat list of languages or create a grouped list.
Before you create language lists, create portals in the languages you want to add to the language switcher and note down the portal Short URL Names.
- To create a flat list, navigate to the Flat List section and click the Add Language button. In the modal, select the Country Flag, enter a Display Name, select the Language from the dropdown and enter the portal Short URL Name. Click Done to save your changes.
- To create language groups, navigate to the Grouped list section and click the Add Language Group button. For each group, provide the Group Title. For instance, for a group of Asian languages, enter "ASIA" as the group title. Within each group, click the Add language button to select the Country Flag, enter a Display Name, select the Language from the dropdown and enter the portal Short URL Name. Click Done to save your changes.
- To create a flat list, navigate to the Flat List section and click the Add Language button. In the modal, select the Country Flag, enter a Display Name, select the Language from the dropdown and enter the portal Short URL Name. Click Done to save your changes.
-
-
Click the Save button to retain the changes you made to the theme.