Creating Workflows
To create a workflow:
-
From the Partition and Departments dropdown menu, select a department.
-
From the Navigation menu, browse to Business Rules > Workflow > Workflow Type.
-
On the List page toolbar, click the New button. For inbound workflows, the New button is a multi-button and you need to select from the Social Workflow or Email Workflow options.
-
On the Properties page, on the General tab, provide the following details.
-
Name: The name of the workflow.
-
Description: Provide a brief description.
-
Active: From the dropdown list, select Yes to make the workflow active.
-
To apply a workflow on activities, you have to make the status active.
-
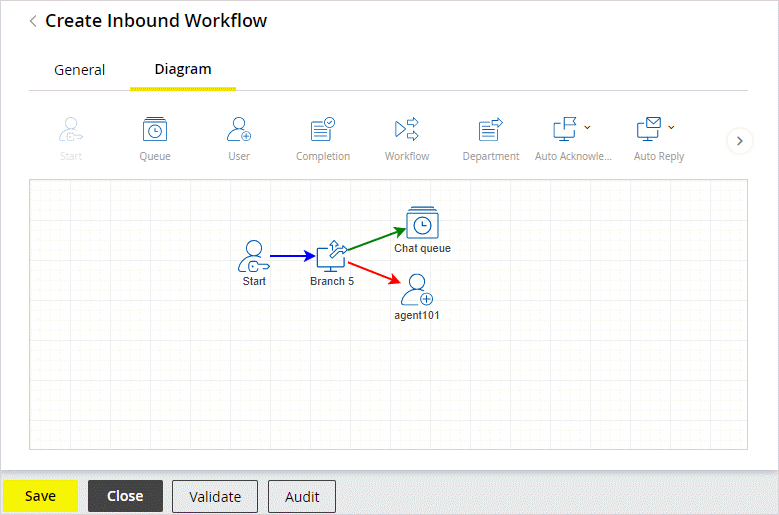
Next, go to the Diagrams tab, and configure the workflow using the various nodes available in the Workflow Editor toolbar.
-
Add the nodes in the Workflow Editor. To add a node, click a node button in the Workflow Editor toolbar, and then click in the Workflow Editor. The node is added in the Workflow Editor and a window for configuring the node properties opens. Set the required properties of the nodes.
For some nodes, you can also add a copy of the nodes created in other workflows or the same workflow. To add a copy of a node, click the arrow next to the node button in the Workflow Editor toolbar, and select the option to add a copy of the node.
-
After adding the nodes, you need to connect them to determine the flow of the workflow. From one node, a connector can point towards only one node, but multiple connectors can point towards the same node. In a workflow, all nodes should be connected to some other node. In the Workflow diagram, click the first node and without releasing the mouse button, click the second node. A connector appears between the two nodes, indicating the flow of the workflow. You can also use the keyboard shortcuts CTRL+S to start the connection and CTRL+E to end the connection. Keyboard shortcut reminders are displayed on screen during the editing process.
-
After you have created the workflow you can use the auto layout option to arrange the nodes neatly. Auto layout arranges the nodes in a way that you can clearly see the flow of the workflow. In the Workflow Editor toolbar, click the Autolayout nodes on canvas
 button. All the nodes in the workflow are arranged systematically.

-
-
Click the Save button.
-
Click the Validate button to validate the workflow. A workflow is validated only if it is in active state. If you have not completed creating the workflow and want to save whatever is done, you can do that by keeping the workflow inactive.
-
Click the Audit button to view an audit trail of the users who have made changes to the workflow and the date and time when the change was made.
Related Topics