-
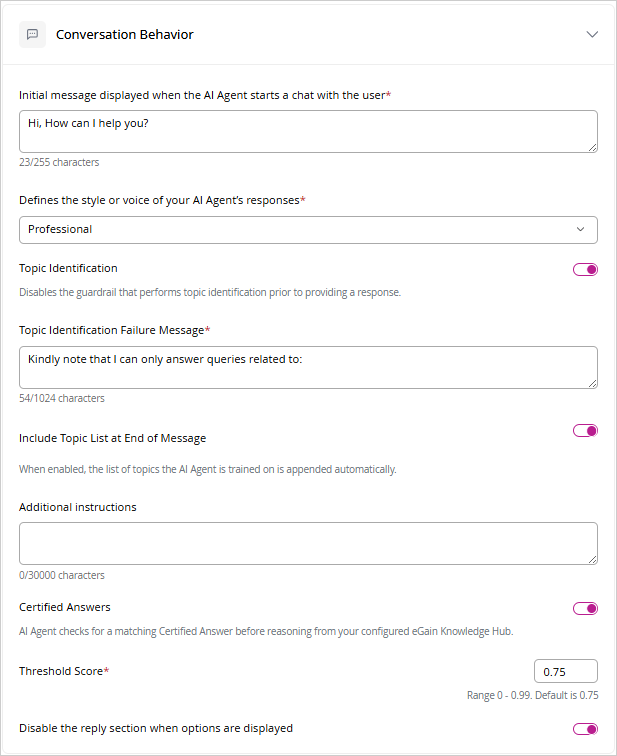
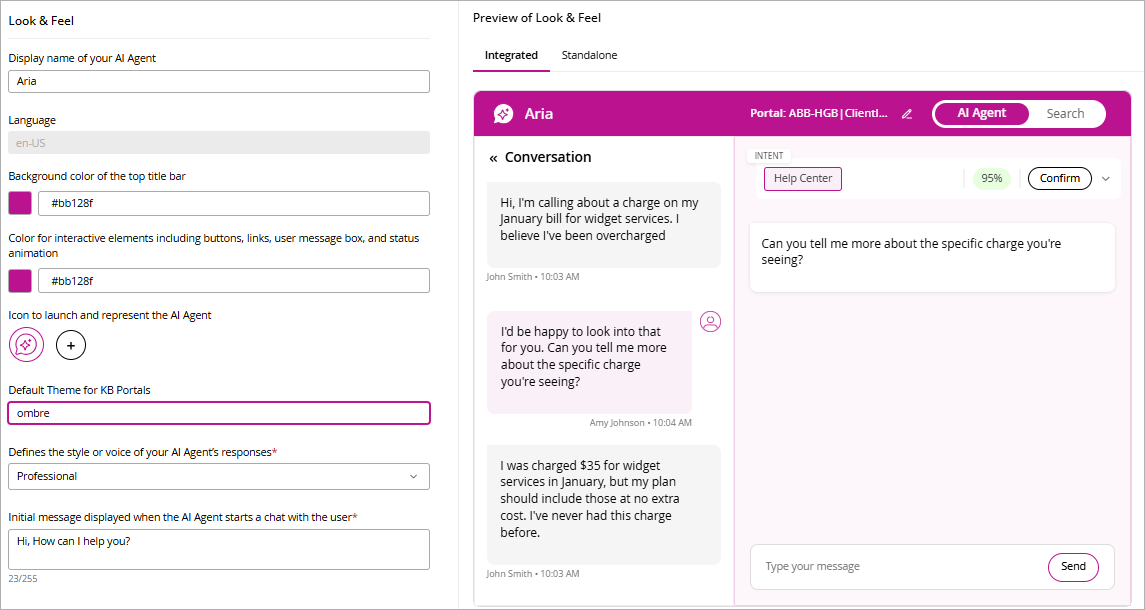
Initial message displayed when the AI Agent starts a chat with the user: Enable this setting to configure the greeting message shown when the AI agent starts a chat with a user. You can choose between Static and Dynamic greeting options.
- Static Greeting: Provide a fixed greeting message that is displayed the first time the user is greeted by the AI agent.
- Dynamic Greeting: Provide instructions that prompt the AI agent to adapt the greeting based on context, enabling a more personalized user experience.
-
Defines the style or voice of your AI Agent’s responses: From the dropdown select one of the available styles for your AI Agent: Professional, Casual, Friendly or Custom. When you select Custom, the Tone Instructions field is displayed. In this field, you can enter custom tone and response instructions (up to 10,000 characters) to tailor the AI Agent’s tone to your business requirements.
-
Topic Identification: Click the Toggle to disable the guardrail that performs topic identification prior to a response. When this guardrail is disabled, the AI agent will no longer restrict responses based on the topics it was trained or configured to handle, and may attempt to generate an answer even for questions outside its intended scope.
-
Topic Identification Failure Message: Provide a custom message (up to 1024 characters) displayed when a user’s query falls outside the AI Agent’s supported topics. By default, it reads: “Kindly note that I can only answer queries related to:”. You can replace this with a branded or tone-matched message.
-
Include Topic List at End of Message: Click the Toggle to automatically append the list of topics the AI Agent is trained on to the end of the Topic Identification Failure Message.
-
Additional instructions: Enter additional instructions to improve the quality of responses by providing additional background about your business.
-
Certified Answers: Enable this setting to allow the AI agent to first check for a matching Certified Answer before generating a response using content from your configured eGain Knowledge Hub.
AI Agent can only return Certified Answers from published articles that are configured for Certified Answers. Create articles using an article type with the Use for Certified Answer setting enabled and add the trusted answer content, and related questions. In addition, the AI Agent must be trained on the knowledge portal or knowledge system that contains the Certified Answer articles. For information about creating and managing Certified Answer articles, see Authoring and Configuring Certified Answers in the Knowledge help.
-
Threshold Score: This setting is enabled only when you enable certified answers. Enable this setting to define how closely a user’s question must match the questions defined in the Knowledge Hub articles for the AI agent to consider it a valid match.
The default Threshold Score is 0.75. As the Threshold Score is increased closer to 0.99 (range: 0–0.99), the AI agent requires a higher similarity between the user’s question and the questions in the Knowledge Hub articles, resulting in more precise and narrowly matched responses.
-
Data Masking: Click the Toggle to enable data masking for sensitive PII data.
-
Disable the reply section when options are displayed: Enable this setting to disable the reply area when the AI agent displays selectable options. The reply area remains disabled until the user makes a selection.
-
Show Heartbeat Content: When enabled, the chat widget displays real-time status messages while the AI Agent is processing a response, for example, "Thinking" or "Fetching Knowledge." This gives customers a visual indicator that the agent is active.