Applying Patterns to Email Channel
Masking patterns can be applied at both the partition and department levels.
At the Partition Level
A partition administrator with the following actions can perform this task:
-
Manage Application Security: This allows you to view the patterns applied to channels and to apply patterns to channels.
-
View Application Security: This gives a read-only view of the patterns applied to channels. Users with this action cannot change any configurations.
What can the partition administrator do?
-
Enable data masking for incoming and outgoing emails for all departments and manage all configurations from the partition level.
-
Give control to the department administrators to configure their settings. At this point, department administrators can choose to configure their settings or continue to use the settings configured by the partition administrators. Once a department administrator decides to configure their settings, they are not affected by the changes made by the partition administrator.
To apply patterns to the email channel:
-
From the Partition and Departments dropdown menu, go to the partition space.
-
In the Navigation menu, browse to Security > Data Masking > Email.
-
On the Properties page, on the General tab, set the following:
-
-
Name: This field is read-only.
-
Description: This field is read-only.
-
Enable data masking in incoming emails: Click the Toggle
 button to enable data masking for incoming emails. By default, this is set to No.
 -
Enable data masking in outgoing emails: Click the Toggle
 button to enable data masking for outgoing emails. By default, this is set to No.
 -
Allow resetting at department level: Click the Toggle
 button to allow department administrators to set their own configurations and masking rules for the email channel. When this setting is enabled, department administrators get an option to either follow the partition level settings or to configure their own.
-
-
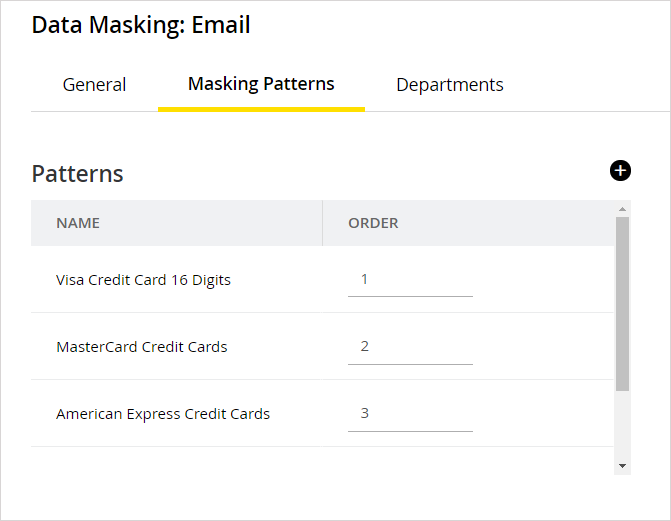
On the Masking Patterns tab, click the Add
 button to select the patterns to be applied to the email channel and define the order of the patterns. While defining the order, make sure that the longest pattern is on top followed by the short patterns. This ensures that patterns that use smaller matches do not partially mask the text that would match the longer text.
For example, if you are selecting both Visa Credit Card 16 Digits and Visa Credit Card 13 Digits, make sure the order is - Visa Credit Card 16 Digits and then Visa Credit Card 13 Digits. If the order is not correct, and let us say you mask the following content: Visa 16: 4485-0713-3727-3343 and Visa 13: 4222-2222-2222-2, it will get masked as Visa 16: ****************343 and Visa 13: ****************. You will notice that the 16-digit credit card did not get masked properly.

-
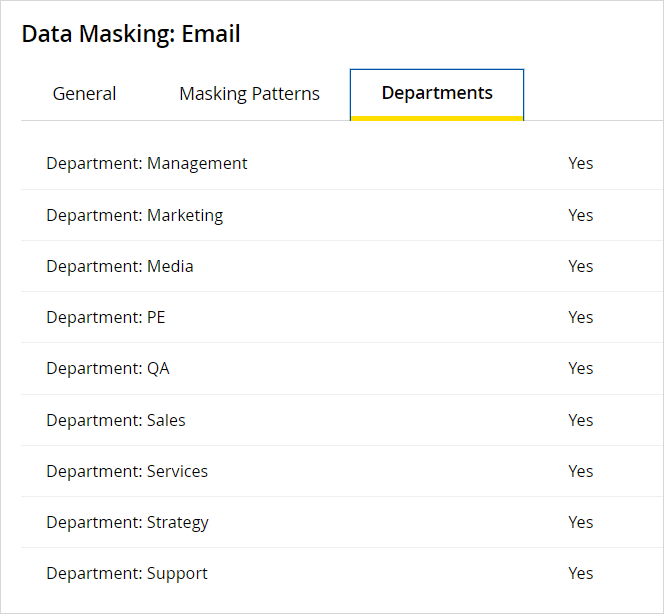
On the Department tab, you can see a read-only view of the departments that are using the masking patterns applied by the partition administrator.

-
Click the Save button.
-
After saving the changes, validate the patterns selected for the channel by using the Validate button.
At the Department Level
A department administrator with the following actions can perform this task:
-
Manage Department Security: This allows you to view the patterns applied to channels and to apply patterns to channels.
-
View Department Security This gives a read-only view of the patterns applied to channels. Users with this action cannot change any configurations.
How much control do department administrators get?
-
If the partition administrator has not given control to department administrators to configure their settings, department administrators get a read-only view of the settings configured by the partition administrator.
-
If the department administrator has the option to configure their settings, and they choose to do so, they are not affected by the changes made to the configurations by the partition administrators.
To apply patterns to the email channel:
-
From the Partition and Departments dropdown menu, select a department.
-
In the Navigation menu, browse to Apps > Email > Data Masking.
-
On the Properties page, click the Enable Department Settings Toggle button if you want to configure data masking for the department. This option is enabled only if the partition administrator allows department administrators to overwrite the partition level settings.
-
On the Properties page, on the General tab, set the following:
-
Name: This field is read-only.
-
Description: This field is read-only.
-
Enable data masking in incoming emails: Click the Toggle
 button to enable data masking for incoming emails. By default, this is set to No.
 -
Enable data masking in outgoing emails: Click the Toggle
 button to enable data masking for outgoing emails. By default, this is set to No.
-
-
On the Masking Patterns tab, click the Add
 button to select the patterns to be applied to the email channel and define the order of the patterns. While defining the order make sure that the longest pattern is on top followed by the short patterns. This ensures that patterns that use smaller matches do not partially mask the text that would match the longer text.
For example, if you are selecting both Visa Credit Card 16 Digits and Visa Credit Card 13 Digits, make sure the order is - Visa Credit Card 16 Digits and then Visa Credit Card 13 Digits. If the order is not correct, and let us say you mask the following content: Visa 16: 4485-0713-3727-3343 and Visa 13: 4222-2222-2222-2, it will get masked as Visa 16: ****************343 and Visa 13: ****************. You will notice that the 16-digit credit card did not get masked properly.
-
Click the Save button.
-
After saving the changes, validate the patterns selected for the channel by using the Validate button.
Related Topics