Creating Click-to-Call Entry Points
Before creating an entry point, create the queues to be used for the entry points. For details on creating queues, see About Queues.
To create an entry point:
- From the Navigation menu, browse to Apps > Click To Call > Entry Points
-
On the List page toolbar, click the New
 button.
A maximum of 75 Click-to-Call entry points can be created.
-
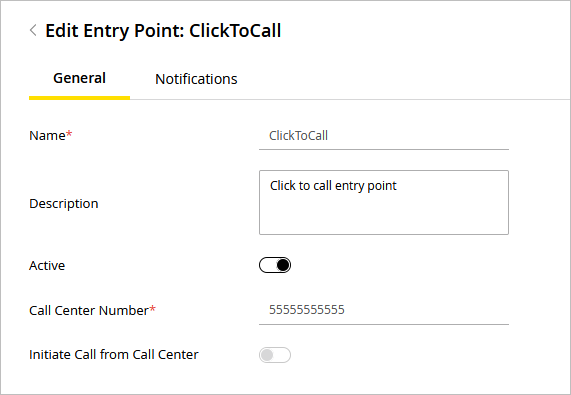
On the Properties page, on the General tab, provide the following details:
-
Name: Type the name for the entry point. This is required information.
-
Description: Type a brief description.
-
Active: Click the Toggle
 button to make the entry point active.
The entry point mapped to the help link should be made active, else the customer is displayed a No Service page.
-
-
-
Call Center Number: Provide the call center's phone number from which a customer will receive a call by clicking the link. This is required information.
-
Initiate Call from Call Center: Click the Toggle
button to make the call an outgoing call from the call center or to make the call an incoming call.
-
-
Click the Save button.
After creating the entry point, set the notifications and test and add the link to your website.
Related Topics