Creating a Resource Template
To create a template for one of the supported resource types:
-
Expand the folder hierarchy on the left of the Resource Browser gadget and select the folder in which you want to create a template. The list of Resource Templates already present in the folder will be listed on the right of the Resource Browser gadget.
-
Click the Create Resource button in the Resource Browser Gadget footer.
This requires the Create button to be enabled.
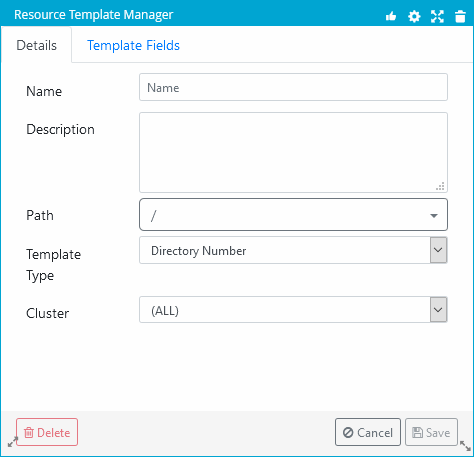
- The Resource Template properties page opens in the Resource Template Manager Gadget.

-
Enter the following details:
-
Name: Enter the name of the template.
-
Path: You can change the folder that the template will be saved into.
-
Template Type: Select the resource type for which you wish to create a template in the drop-down menu (for example, Directory Number, IP Phone).
-
-
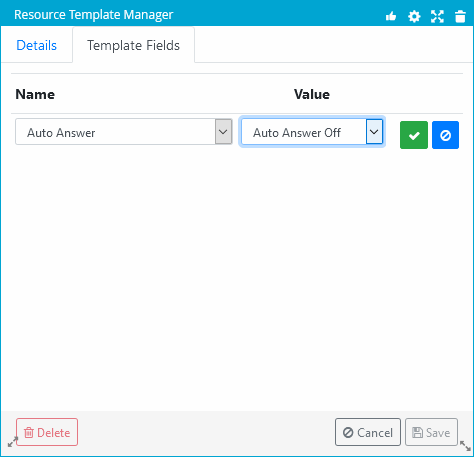
Open the Template Fields tab. This allows you to pre-populate one or more of the resource properties in the template.

-
Click the Add Field button and enter the following details:
-
Name: Select a resource property from the drop-down menu.
-
Value: Enter or select a value to be pre-populated in this property. If the property is true/false then a check-box is displayed. In which case, check it for True, or leave it unchecked for False.
-
Click the Save
 button to set the pre-populated value or the Cancel
  button to discard it.
-
-
To amend an existing pre-populated field value, click the Edit
 button.
 -
Click the Delete
 button to remove an existing pre-populated field value.
 -
Click the Save button.
Related Information