Creating Queues
Configure General Properties
To create a queue:
-
From the Partition and Departments dropdown menu, select a department.
- From the Navigation menu, browse to Business Rules > Queues.
-
On the List page toolbar, click the New
 button.
 -
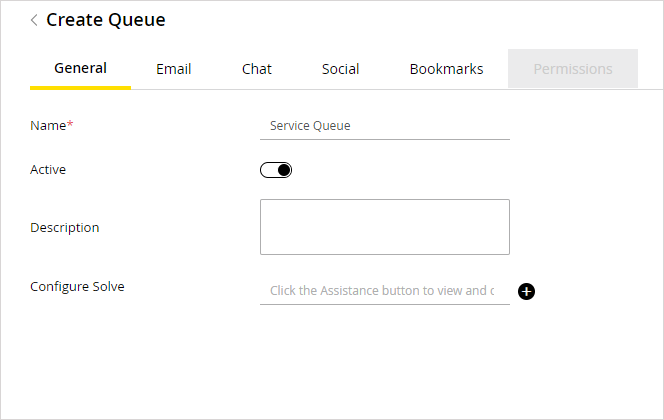
On the Properties page, on the General tab, set the following properties of the queue:
-
Name: Type a name of the queue. This is required information. The following characters are not allowed in the name: < , . ? : > $ * \ /
-
Active: Click the Toggle button to make the queue active. If you are using a queue in workflows or are intending to use it, it is advised that you do not make the queue inactive. If a queue is being used in workflows and it is made inactive, no new incoming activities are routed to the queue. All activities coming to an inactive queue are routed to the exception queue. Also, if the queue is being used in workflows, and agents have pull and transfer permissions on the queue, they can pull activities from, and transfer activities to inactive queues. If you want to restrict these actions, remove the pull and transfer permissions on the inactive queue.
-
Description: Type a brief description.
-
Configure Solve: Configure the web page to be displayed when agents access the Solve button from the Reply pane. The Solve button is available only for CallTrack, Social, Email, and Chat activities. For details on setting this field, see Configuring Solve.
-
-
Click the Save button.
Configure Email Properties
Go to the Email tab and set the following properties.
To configure the email properties:
-
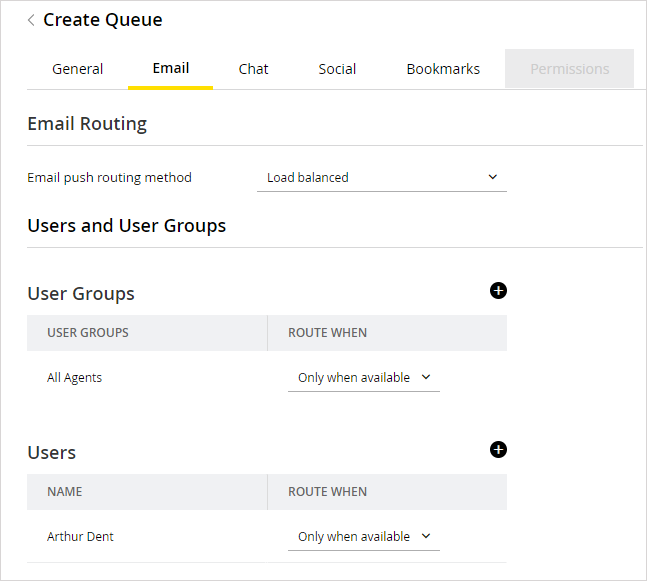
In the Email Routing section, set the Email push-routing method. From the dropdown list, select the method you want to use. There are three options available:
-
None: Activities do not get assigned to any agent. They stay in the queue, and agents have to pull them from the queue.
If you select the push-routing method for the queue as none, make sure that you give users pull permission on the queue. If you do not give proper permissions on the queue, no user will be able to work on the activities coming in the queue.
-
Load balanced: Activities are routed to available agents who have least number of activities in their inbox.
-
Round robin: Activities are routed to all agents alternatively, irrespective of the number of activities in their inbox.
If you select the push-routing method as round robin or load balanced, then you need to select the users to whom the activities are to be assigned. You can select users from the Users and User Groups section.
-
-
The Users and User Groups section is enabled only if the push-routing method is set as Round robin or Load balanced.
-
-
In the User Groups section, click the Add
 button and select the user groups from the available user groups list. In the selected user groups list, specify when the activities are to be routed to users in the user group. The options available are:
-
Always: While routing activities, the availability of agents is not checked and activities are assigned to both available and unavailable agents.
-
Only when Available: Activities are routed to agents only when they are available.
-
-
-
-
In the User section, click the Add
 button and select users from the available users list. In the selected users list, specify when activities are to be routed to users. The options available are:
-
Always: While routing activities, the availability of agents is not checked and activities are assigned to both available and unavailable agents.
-
Only when Available: Activities are routed to agents only when they are available.
-
-
-
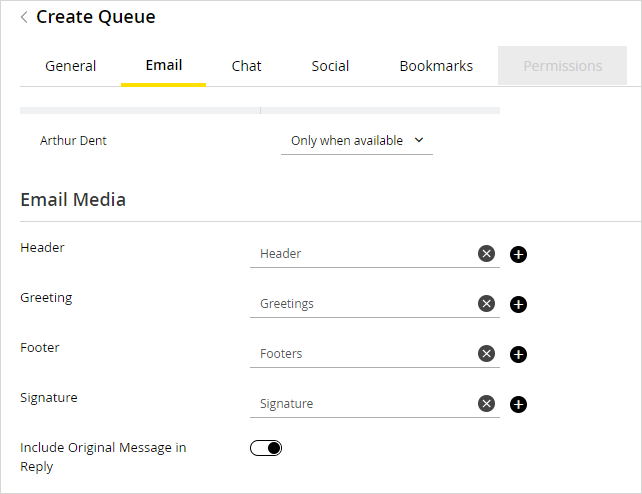
Go to the Email Media section, and select the headers, footers, greetings, and signatures to be associated with the queue. For each queue, you can configure the header, footer, signature and greeting to be associated with the queue. The selected header, footer, signature and greeting are available to the agents in the Reply pane toolbar, for quick access. The selected header, footer, signature, and greeting are also automatically added to the Reply pane, and the agent can choose to use them or delete them, if he does not want to use them. Provide the following details.
You must create the headers, footers, greetings, and signatures articles from the Knowledge Console. Only one greeting, header, footer, and signature can be associated with a queue.
-
-
Header: To select a header, click the Add
 button. In the Select Article window that appears, select a header article. To remove article selection, select the Company folders node.
 -
Greeting: To select a greeting, click the Add
 button. In the Select Article window that appears, select a greeting article. To remove article selection, select the Company folders node.
 -
Signature: To select a signature, click the Add
 button. In the Select Article window that appears, select a signature article. To remove article selection, select the Company folders node.
 -
Footer: To select a footer, click the Add
 button. In the Select Article window that appears, select a footer article. To remove article selection, select the Company folders node.
 -
Include original message: Click the Toggle button to enable or disable the displaying of incoming messages from the customer in the Reply pane of the Advisor Desktop. If this option is disabled, the incoming message is displayed in the Activity Body section of the Information pane. By default this option is enabled.
-
Configure Chat Properties
Go to the Chat tab and set the following properties.
To configure the chat properties:
-
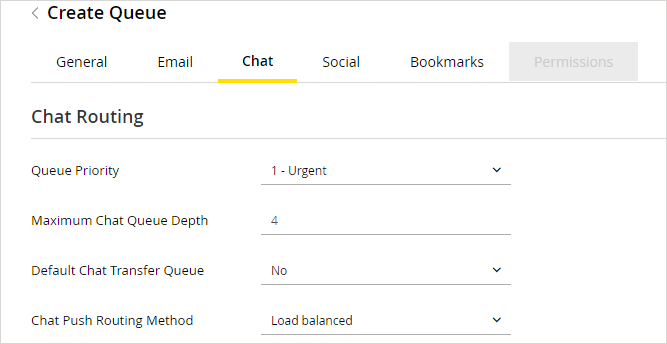
In the Chat Routing section, set the following:
-
Queue Priority: Set the priority of the queue. Chats from the highest priority queues will get assigned to agents first. For example, let us say there are three queues with different priorities and chats come in the queues at the times indicated in the following table and one agent is available for handling chats. The service order will be: Jack, Bob, Beth, Jane, Mary, Ron.
Queue 1, High priority
Queue 2, Medium priority
Queue 3, High priority
Beth, 8:15
Ron 8:20
Jane 8:30
Jack, 8:00
Mary 8:05
Bob 8:10
-
Maximum chat queue depth: For details, see Configuring Maximum Queue Depth for Chats.
-
Default chat transfer queue: This field is enabled after a queue is saved. For details, see Routing chats transferred from other departments.
-
Chat push routing method: From the dropdown list, select the method you want to use. There are two options available:
-
None: If None is selected, chats are not pushed from the queue to any users. Users have to explicitly pull chats from the queue to service them.
-
-
If you select the push-routing method for the queue as None, make sure that you give users pull permission on the queue. If you do not give proper permissions on the queue, no user will be able to work on the activities coming in the queue.
-
Load balanced: If Load balanced is selected, chats get automatically assigned to the user with the minimum number of open chat activities. In case there is a tie between two or more agents with the same number of chats, the user who has been waiting the longest since any chat was assigned to him gets priority over others. If you select this option, you have to select the list of users and user groups to whom chats must be routed. This is done from the Relationships section in the Chat tab.
-
-
-
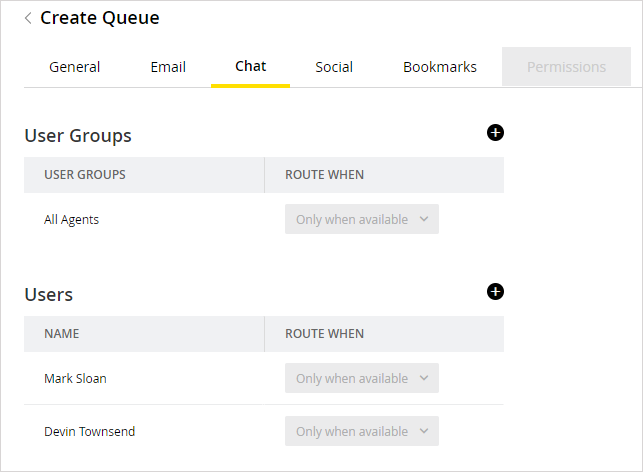
Next, go to the Users and User Groups section and select the users and user groups to whom chat activities are to be assigned from the queue. Chats are routed to agents only when they are available for handling chats.
-
In the User Groups section, click the Add
 button and select the user groups from the available user groups list.
 -
In the User section, click the Add
 button and select users from the available users list.
-
-
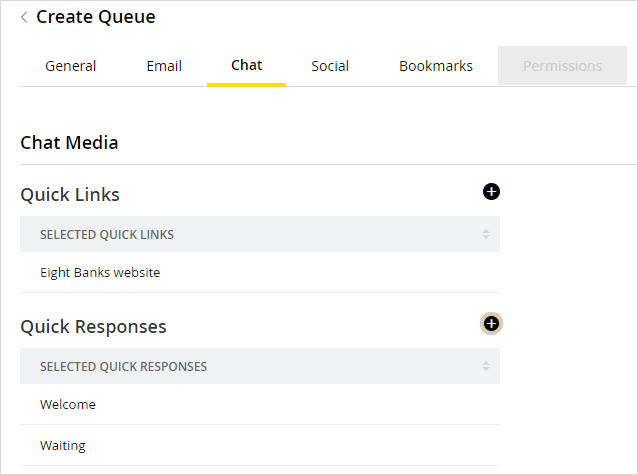
In the Chat Media section, set the following.
-
Chat - Quick links: Click the Add
 button. From the available quick links, select the quick links to be associated with the queue. Up to 150 quick links can be assigned to a queue.
 -
Chat - Quick responses: Click the Add
 button. From the available quick responses, select the quick responses to be associated with the queue. Up to 150 quick responses can be assigned to a queue.
-
-
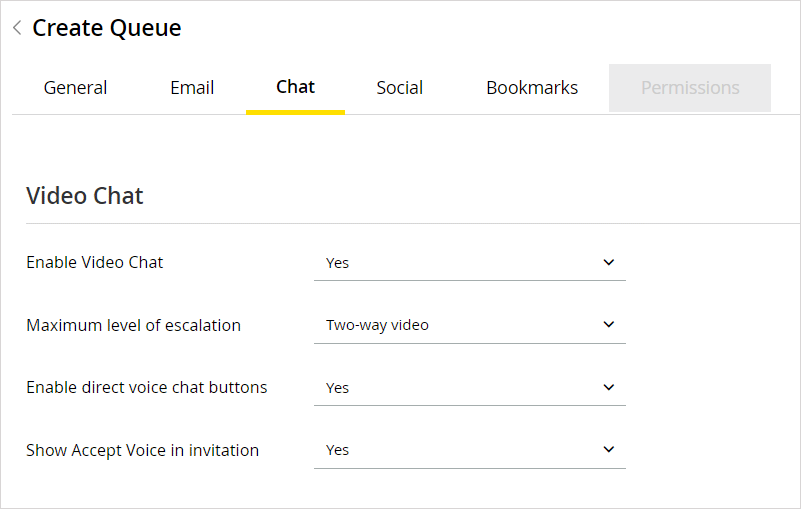
In the Video Chat section, set the following:
-
Enable Video Chat: Select whether to enable video chat for the queue. Select Yes to enable and No to disable. For more information, see Configuring Video Chat.
Video chats from other departments can only be transferred to this department if the video chat setting has been enabled for the default chat queue.
-
Maximum level of escalation: Select the maximum level to which the activities in this queue can be escalated when a customer clicks the audio or video chat buttons during a chat interaction. Options include Two-way video, One-way video: Agent video, One-way video: Customer video, Two-way voice. By default, Two-way video is selected.
-
Enable direct voice chat buttons: Select whether to enable the ability for customers or agents to click the Voice button to initiate an audio-only voice chat. Select Yes to enable and No to disable.
-
Show Accept Voice in invitation: Select whether to enable the ability for customers to accept the invitation with just audio. This allows for two-way audio chats and one-way video chat. Select Yes to enable and No to disable.
-
-
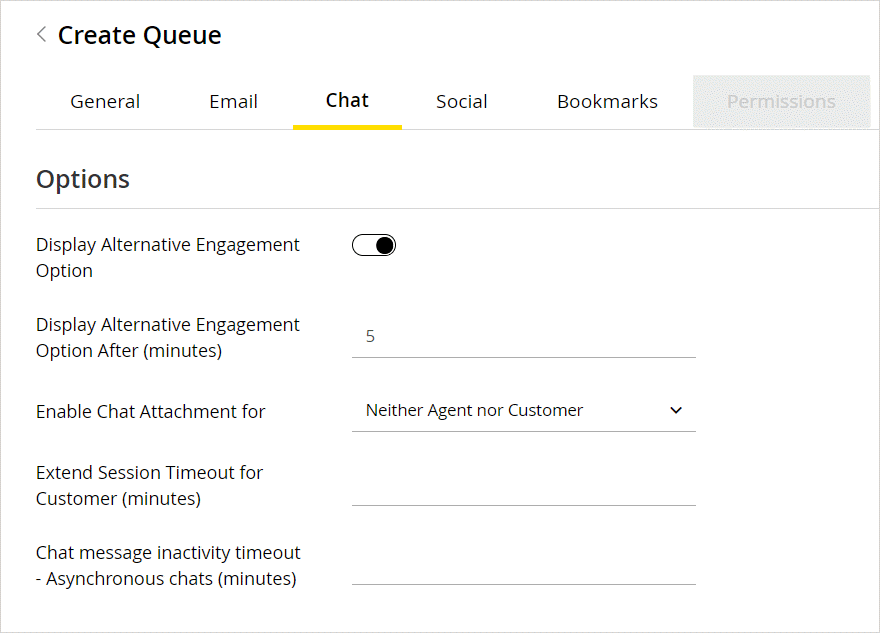
In the Options section, set the following:
-
Display Alternative Engagement Option: Click the Toggle button to display the alternate engagement options in the chat window while customers are waiting to be serviced by agents. This is disabled by default.
-
Display Alternative Engagement Option After (minutes): Define the time after which the alternate engagement options will be presented to the customer. If you do not set a value, customers will see the options as soon as they start the chat.
-
Enable Chat Attachments for: If Chat attachments are enabled in the partition, you can select one of the following options. Image attachments sent during chat interactions appear in line. The allowed or blocked file types and the size limits of the chat attachments are configured at the partition level. For more information about configuring attachments settings, see About File Attachments.
-
-
Both agents and customers
-
Neither agents nor customers
-
Agents only
-
Customers only
-
-
Extended Session Timeout for Customers (minutes): Define the period of time in which the system should attempt to reconnect with a customer in the event of a disconnection during the chat. If a chat between an agent and a customer suddenly disconnects, the application attempts to reconnect the agent and customer for the amount of time specified in this field and resets upon a successful connection.
-
Chat message inactivity timeout - Asynchronous chats (minutes): Define the period of time that is allowed to pass before the system considers the activity inactive and times out for asynchronous chat activities like Facebook Messenger, X DMs, etc.
-
Configure Social Properties
Go to the Social tab and set the following properties.
To configure the social properties:
-
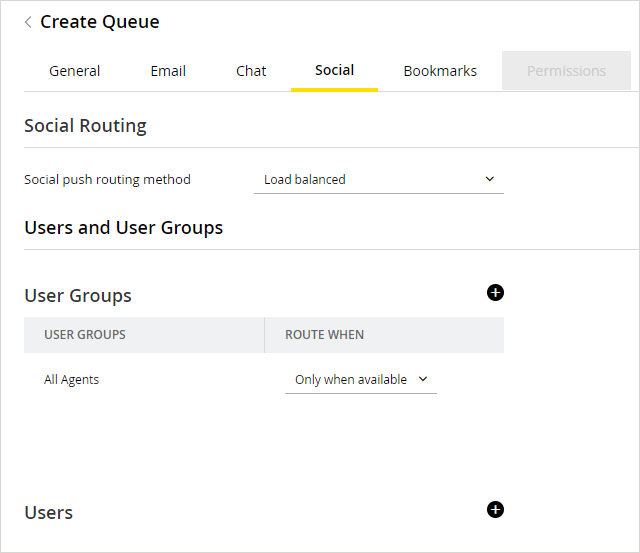
In the Social Routing section, set the Social push routing method. From the dropdown list, select one of the following options:
-
None: Activities do not get assigned to any agent. They stay in the queue, and agents have to pull them from the queue.
-
If you select the push-routing method for the queue as none, make sure that you give users pull and transfer permissions on the queue. If you do not give proper permissions on the queue, no user will be able to work on the activities coming in the queue
-
-
Load balanced: Activities are routed from the queue, to available agents who have least number of activities in their inbox.
-
Round robin: Activities are routed from the queue to all agents alternatively, irrespective of the number of activities in their inbox.
-
-
The Users and User Groups section is enabled only if the push-routing method is set as Round robin or Load balanced.
-
In the User Groups section, click the Add
 button and select the user groups from the available user groups list. In the selected user groups list, specify when the activities are to be routed to users in the user group. The options available are:
-
Always: While routing activities, the availability of agents is not checked and activities are assigned to both available and unavailable agents.
-
Only when Available: Activities are routed to agents only when they are available.
-
-
In the User section, click the Add
 button and select users from the available users list. In the selected users list, specify when activities are to be routed to users. The options available are:
-
Always: While routing activities, the availability of agents is not checked and activities are assigned to both available and unavailable agents.
-
Only when Available: Activities are routed to agents only when they are available.
-
-
Configure Bookmarks
To configure the bookmarks:
-
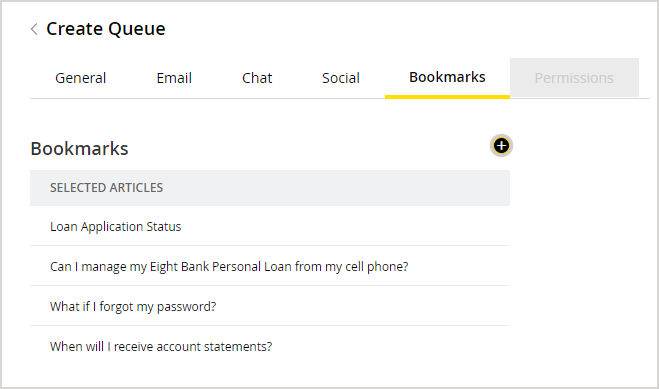
Go to the Bookmarks tab. Click the Add
 button to select the articles to be associated with the queue. The bookmarked articles are available to agents in the Reply pane for quick access.
Configure Permissions
To configure the permissions:
-
Go to the Permissions tab and assign permissions to users and user groups. For details, see Assigning Queue Permissions.
Related Topics