Configuring Languages
You can define the languages that your portal supports using the Languages setting. The languages you select here become available as language options throughout the theme workspace, including the header language switcher, links bar, footer, and labels settings. The changes that you make can be viewed simultaneously in the theme workspace.
To configure languages:
-
In the Navigation Menu, browse to Publishing >Themes.
-
On the Themes page, navigate to the Custom Themes section and click the Edit button next to the theme you want to customize.
-
In the Themes workspace, navigate to Global > Branding & Identity > Languages and click the Expand button.
-
Under Selected Languages, click the Add
 button to open the Select Languages list.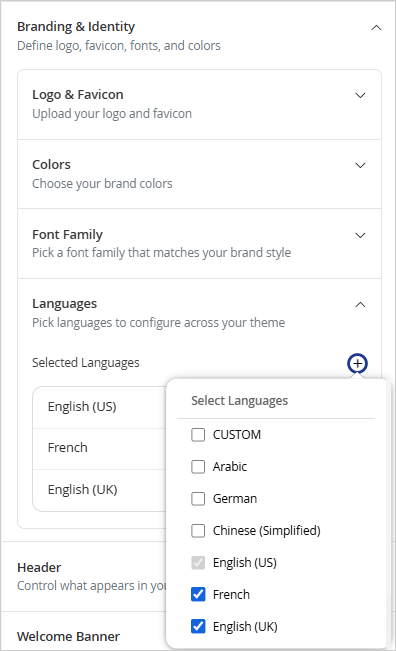
-
Select the checkbox next to each language you want to make available for the portal. English (US) is the default language and is always selected.
-
The languages you select appear in the Selected Languages list. To remove a language, click the checkbox to deselect the language.
Removing a language permanently deletes the custom localization configured for that language, including labels, custom links and footer links, suggestion titles and options, and language switcher entries. This action cannot be undone.
-
Click the Save button to retain your changes.
Once a language is added here, it becomes available as a selectable option in the following settings. You must configure the language-specific labels, links, and text separately in each of these settings:
-
Header > User Control > Language Switcher. For more information, see Setting Up Header User Controls.
-
Links Bar link and category modals. For more information, see Configuring the Links Bar.
-
Multi-Column and external footer component modals. For more information, see Customizing the Footer.
-
Manage Labels. For more information, see Managing Labels.
-
Suggestions Title and Description Options. For more information, see Customizing the Suggestions Page.